
Diff for 'SFTP'
|
Editor:
Volat, Matthieu
Size:
1122:
Time:
2018-02-22 10:54:16z
Comment:
Save progress
|
Editor:
Volat, Matthieu
Size:
1395:
Time:
2018-02-22 11:00:40z
Comment:
Finish configuration
|
| Deletions are marked like this. | Additions are marked like this. |
| Line 19: | Line 19: |
| Line 21: | Line 22: |
| Use the button "New Site" (1.) to add a new bookmark that you can rename (2.). | Like in the screenshot bellow, use the button "New Site" (1.) to add a new bookmark that you can rename (2.). Then fill out the server information (3.) with: * Host: `lstemars.univ-lyon1.fr` * Protocol: `SFTP` * Logon type: `normal` * User: your MarsSI login * Password: your MarsSI password |
| Line 23: | Line 30: |
After that, you can connect to the server. |
This feature currently is not available to regular users yet.
Here we will see how to retrieve MarsSI data using the Filezilla client software and the Secure File Transfert Protocol (SFTP).
Since SFTP is a well established standard, you can easily use other clients such as the sftp unix program or WinSCP, but documenting multiple client is outside of the scope of this page.
Installing and configuring Filezilla Client
First, you need to download the Filezilla Client for MacOS/Linux distributions/Windows on their website: https://filezilla-project.org/download.php?type=client, but Linux users should probably use their distribution package/application manager.
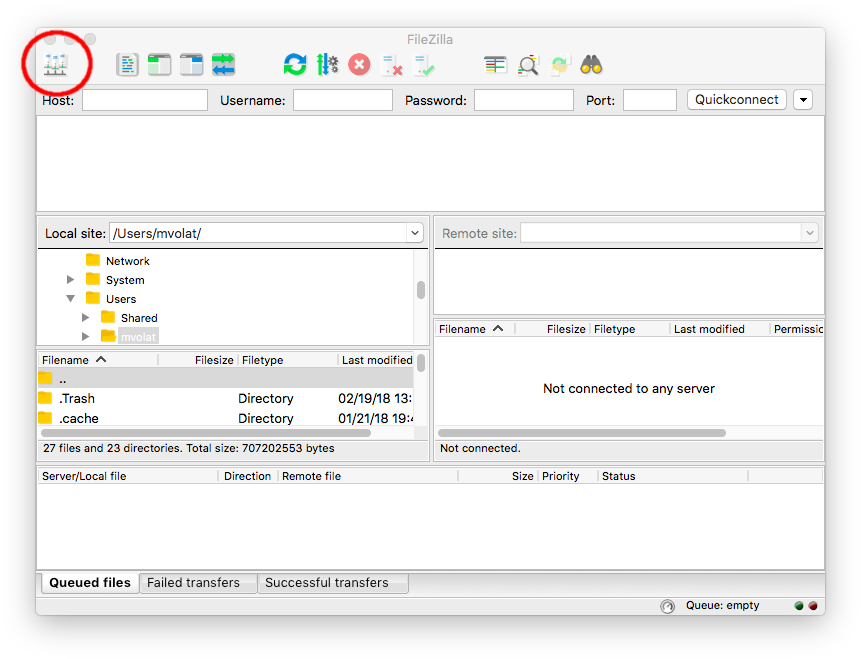
Install it, you can (and should) skip intalling the optionnal parts. Run it and select the site manager, circled in red on the following screenshot:
Like in the screenshot bellow, use the button "New Site" (1.) to add a new bookmark that you can rename (2.). Then fill out the server information (3.) with:
- Host:
lstemars.univ-lyon1.fr - Protocol:
SFTP - Logon type:
normal - User: your MarsSI login
- Password: your MarsSI password
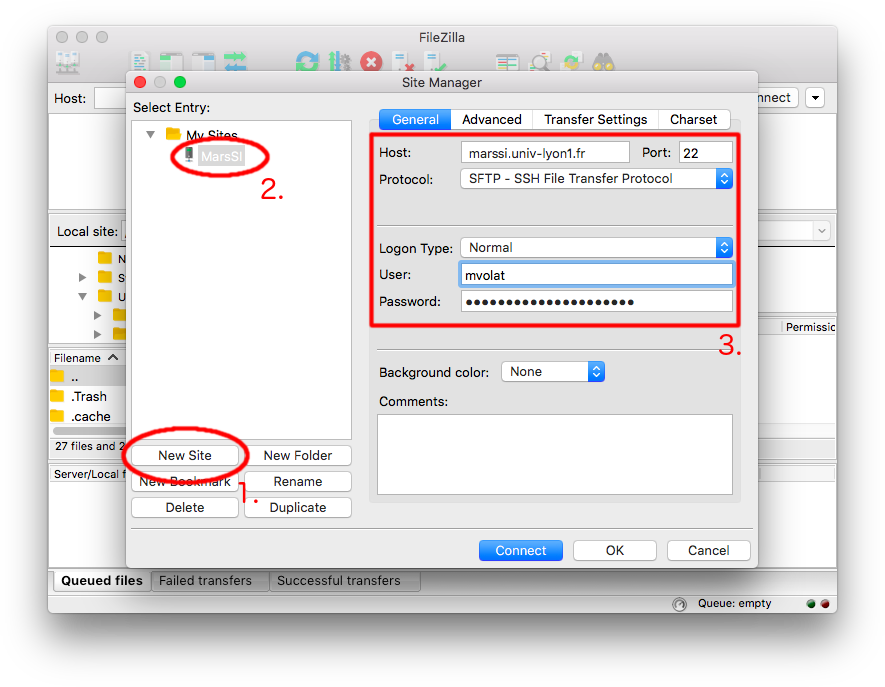
After that, you can connect to the server.
Connecting to the MarsSI data server
..