
Diff for 'GettingStarted'
|
Editor:
Volat, Matthieu
Size:
5326:
Time:
2021-10-20 06:06:28z
Comment:
Django interface is now default.
|
Editor:
mvolat
Size:
8078:
Time:
2025-02-07 16:06:10z
Comment:
|
| Deletions are marked like this. | Additions are marked like this. |
| Line 1: | Line 1: |
| ## page was renamed from GettingStarted2 ## page was renamed from GettingStartedDjango ## page was renamed from Getting-started-django |
|
| Line 7: | Line 3: |
| == Connection to MarsSI == The application is open to the scientific community via the website: [[https://marssi.univ-lyon1.fr/|marssi.univ-lyon1.fr]]. |
== Connecting to MarsSI == |
| Line 10: | Line 5: |
| A login and a password are required. To create an account, a request has to be made via [[https://marssi.univ-lyon1.fr/signup/|the contact form]]. We will create for you a personal account on MarsSI. Your credentials will be emailed back to you and they are the same for the access to the MarsSI application, the wiki and to the SFTP server. | MarsSI is open to the all science communities, and is accessed from a web browser: open a new window or tab with the following URL: [[https://marssi.univ-lyon1.fr/|marssi.univ-lyon1.fr]]. |
| Line 12: | Line 7: |
| {{attachment:connection.jpg||width="800"}} | You will be greeted by the welcome page, offering you to login, signup or browse the portal as a guest. If you already signed up, use the connexion button and your login and password that was sent to you by email. |
| Line 14: | Line 9: |
| == MarsSI homepage == There are 3 tabs corresponding to 3 environments: |
{{/connection.jpg||width="800"}} |
| Line 17: | Line 11: |
| * the “Maps” tab for data visualization and selection | If you do not have an account, you need to send a signup request using the "signup" button or visit [[https://marssi.univ-lyon1.fr/MarsSI/signup/]]. Please fill the signup request using a institutional email and describing a credible usage of the plaform allows us to accept your application as a valid request from the scientific community. We will create for you a personal account on MarsSI. Your credentials will be emailed back to you and they are the same for the access to the MarsSI application, the wiki and to the SFTP server. {{/signup.jpg||width="800"}} Once you have a login and a password, you can use those go enter MarsSI {{/login.jpg||width="800"}} == MarsSI web interface == Just bellow the logos, you will see buttons that controls the current environment (tab) displayed. There is 6 tabs, but the last one will rather open this wiki. The tabs are: * the "Target" tab set which body/view you will be using in your session * the “Maps” tab for data exploration and selection on a geographic information system * the "Search" tab performs searches using keywords |
| Line 21: | Line 29: |
| {{attachment:tabs.jpg||width="800"}} | {{/tabs.jpg||width="800"}} On the top right corner, you will have links to edit your profile informations and logout of the portal. === "Target" tabs === This simple tab list the targets (planets) you can switch to. When you switch to a target, it will displayed in the map tab and used to filter search results. {{/target.jpg||width="800"}} |
| Line 24: | Line 40: |
| Line 26: | Line 43: |
| {{attachment:map.jpg||width="800"}} | {{/map.jpg||width="800"}} |
| Line 30: | Line 47: |
| The map tools provides you with a few controls: you can zoom in and out using the buttons (or mouse wheel). The next button will reset the world view if you're lost. The "select area" control will allow you to draw a rectangle and select products from the displayed dataset layers. You can repeat this operation to add more products to your selection. You can then right-click to either erase your selection or send it to your workspace where you will be able to perform more actions (see Workspace section). You can also use the measure tool to perform some distance measurements on the map. Finally, if you want to display information about a dataset, simply click on it to have a popup with its attributes displayed. | The map tools provides you with a few controls: you can zoom in and out using the buttons (or mouse wheel). The next button will reset the world view if you're lost. You can also use the measure tool to perform some distance measurements on the map. Finally, if you want to display information about a dataset, simply click on it to have a popup with its attributes displayed. {{/map2.jpg||width="800"}} The "select area" control will allow you to draw a rectangle and select products from the displayed dataset layers. You can repeat this operation to add more products to your selection. You can then right-click to either erase your selection or send it to your workspace where you will be able to perform more actions (see Workspace section). {{/map3.gif||width="800"}} |
| Line 33: | Line 56: |
| {{{#!wiki caution '''Work in progress''' |
|
| Line 36: | Line 57: |
| The search functionality is still quite limited for now. Expect improvements to come. }}} |
The search tab allows to look for observations based on keywords. There is mostly two ways to search for data: either use generic keywords and maybe some coordinates to get a selection of data corresponding, or try to enter a product ID to find a more specific observation. |
| Line 39: | Line 59: |
| If you want to search through observation by name, switch to the "Search" tab. Type the (partial) name of the observation you want to look for and click on the search button. You will be presented a list of relevant results: | With the first approach, the search engine will try to recognize words such as targets (mars, moon, mercury, ...), orbiters (mro, mex, ...), instruments (omega, hirise, ...), product types (edr, dem...) and return a list of observations that fit those keywords. If a coornidate in the "lat:lon" format is present, only observation that cover this point are shown. |
| Line 41: | Line 61: |
| {{attachment:search.jpg||width="800"}} | {{/search.jpg||width="800"}} |
| Line 43: | Line 63: |
| You can order the result table by column, look at products footprints or add them to your workspace. | Note that results are paginated, be sure to check following pages. Words that are not recognized are taken to be a product ID search critera. The search will try to find all the observations with a (partial) matching of product ID. {{/search2.jpg||width="800"}} For earch result, you can click the "Add to workspace" button to add the specific observation to your workspace, as if it was selected from the map tab. |
| Line 46: | Line 72: |
| Line 54: | Line 81: |
| {{attachment:workspace.jpg||width="800"}} | {{/workspace.jpg||width="800"}} Product statuses are the following: need-processing:: this product is not processed yet, you must request it queued:: this product has been requested, but is waiting for a computation slot running:: this product is being processed completed:: this product is ready -- you can request a copy to use it failed:: this product processing failed -- it is unusable |
| Line 59: | Line 93: |
| Line 63: | Line 98: |
| Usually, you need to process a dataset until you have all the products you want, then use the copy action to have these results in your personal directory. Process and copy status can be seen on the "Jobs" tab (see next item). Product copied to your home directory can be retrieved using the [[SFTP|SFTP server]]. | Select the observations entries you would like to process with the ticks on the left of the data table, then select the Process action and click "Go". You can also queue Copy request so that data is copied to your personal directory -- if there is queued or running jobs regarding the data, the copy operation will be scheduled to run after the processing is finished. You need to process a dataset until you have all the products you want, then use the copy action to have these results in your personal directory. Process and copy status can be seen on the "Jobs" tab (see next item). |
| Line 66: | Line 103: |
| Line 68: | Line 106: |
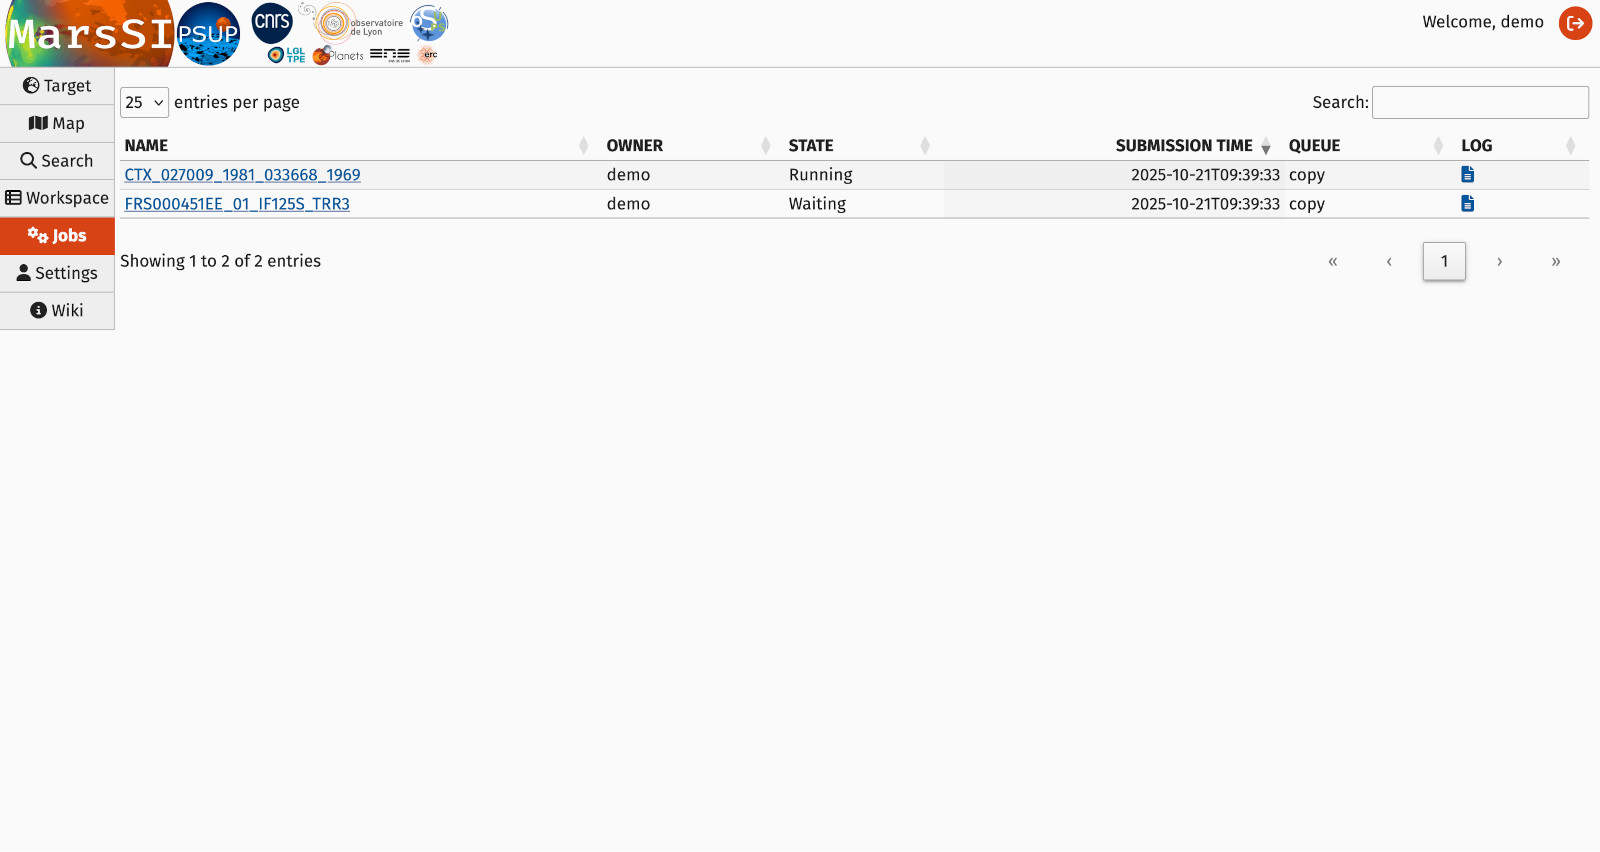
| {{attachment:jobs.jpg||width="800"}} |
{{/jobs.jpg||width="800"}} |
| Line 72: | Line 109: |
| Line 73: | Line 111: |
== Retrieving the data == To retrieve the data, you must have requested copies as shown at the end of the Workspace section, and those "copy" jobs must be finished. Data copied is kept for 30 days, but the original is not deleted from MarsSI, so you can re-request a copy if needed. Product copied to your home directory can be retrieved using SFTP as shown in the [[SFTP|SFTP tutorial]]. |
Connecting to MarsSI
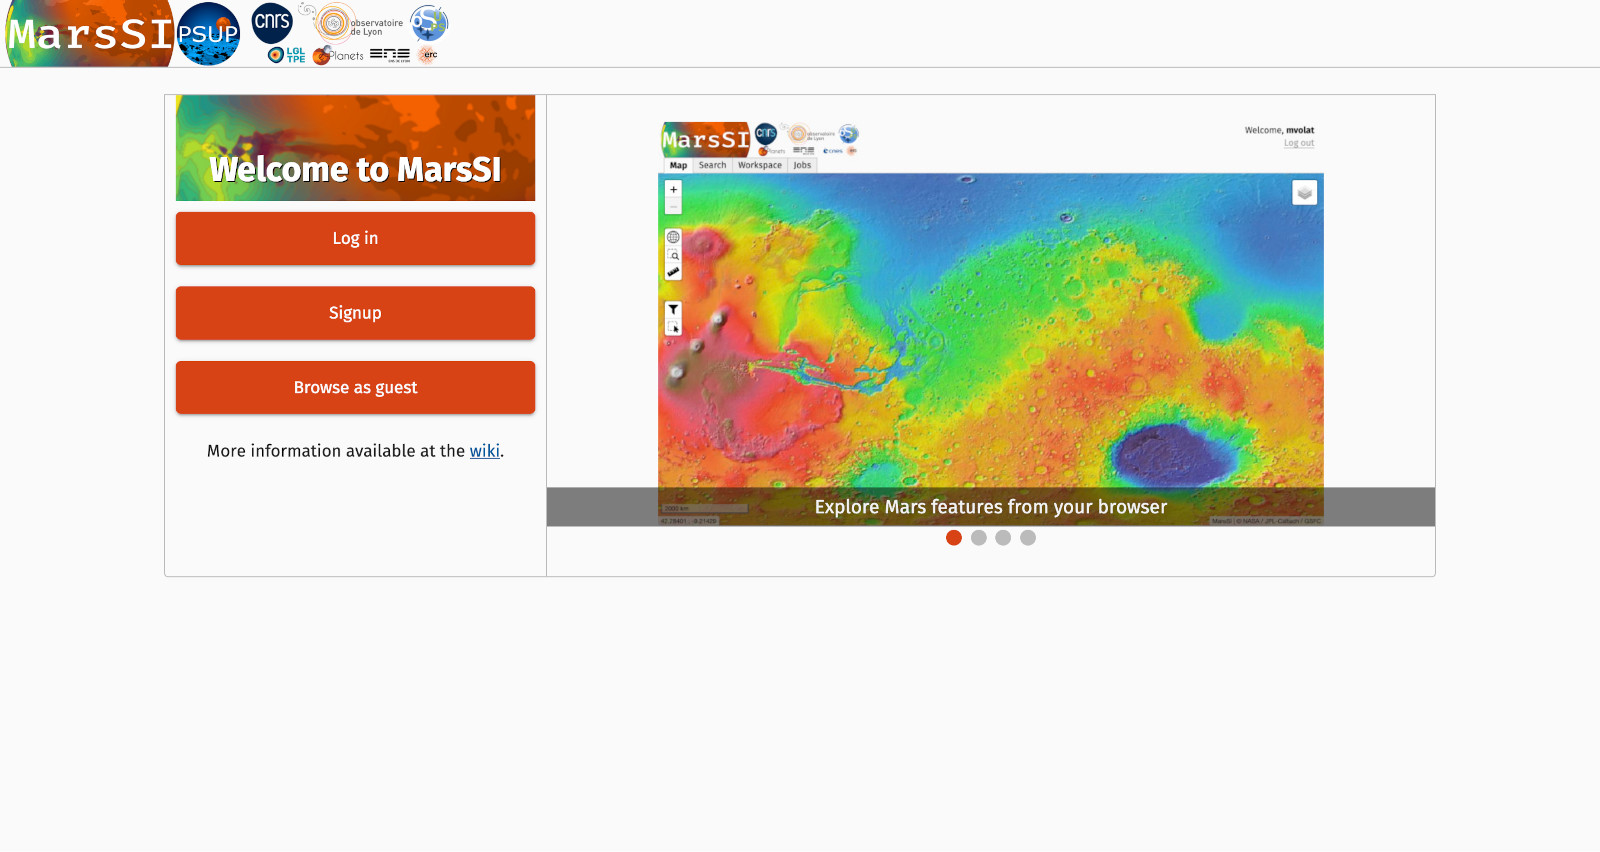
MarsSI is open to the all science communities, and is accessed from a web browser: open a new window or tab with the following URL: marssi.univ-lyon1.fr.
You will be greeted by the welcome page, offering you to login, signup or browse the portal as a guest. If you already signed up, use the connexion button and your login and password that was sent to you by email.
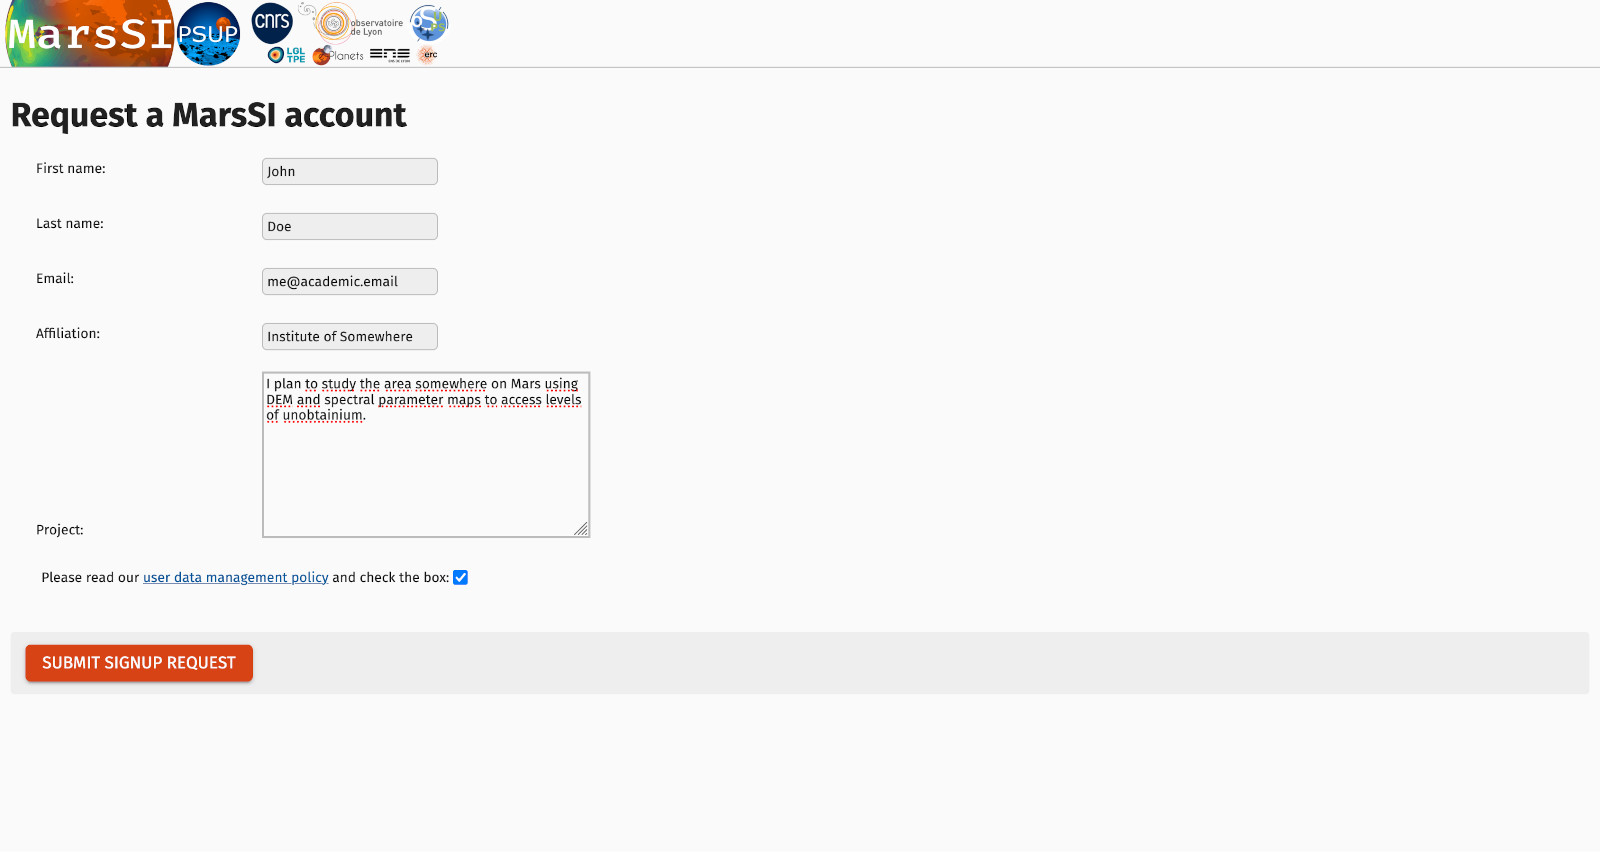
If you do not have an account, you need to send a signup request using the "signup" button or visit https://marssi.univ-lyon1.fr/MarsSI/signup/. Please fill the signup request using a institutional email and describing a credible usage of the plaform allows us to accept your application as a valid request from the scientific community. We will create for you a personal account on MarsSI. Your credentials will be emailed back to you and they are the same for the access to the MarsSI application, the wiki and to the SFTP server.
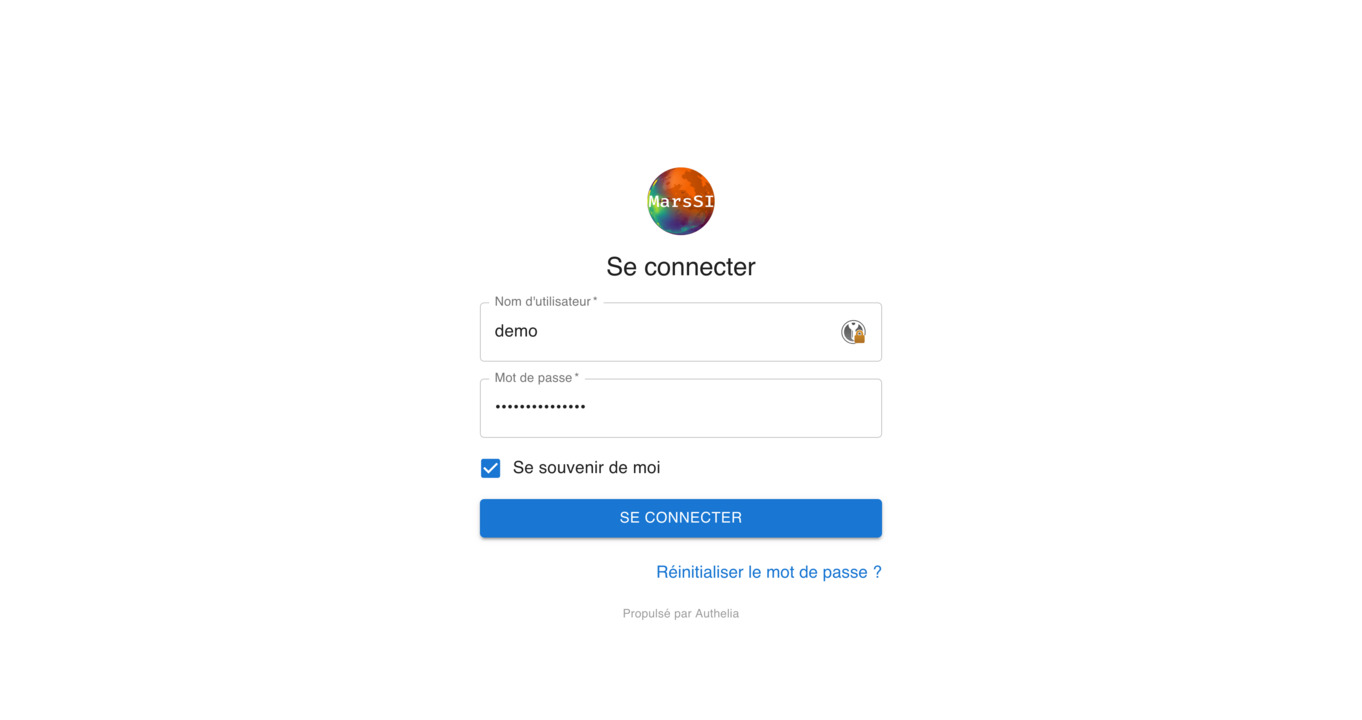
Once you have a login and a password, you can use those go enter MarsSI
MarsSI web interface
Just bellow the logos, you will see buttons that controls the current environment (tab) displayed. There is 6 tabs, but the last one will rather open this wiki. The tabs are:
- the "Target" tab set which body/view you will be using in your session
- the “Maps” tab for data exploration and selection on a geographic information system
- the "Search" tab performs searches using keywords
- the “Workspace” tab to list selected data and request processing
- the “Jobs” tab shows information about data processing
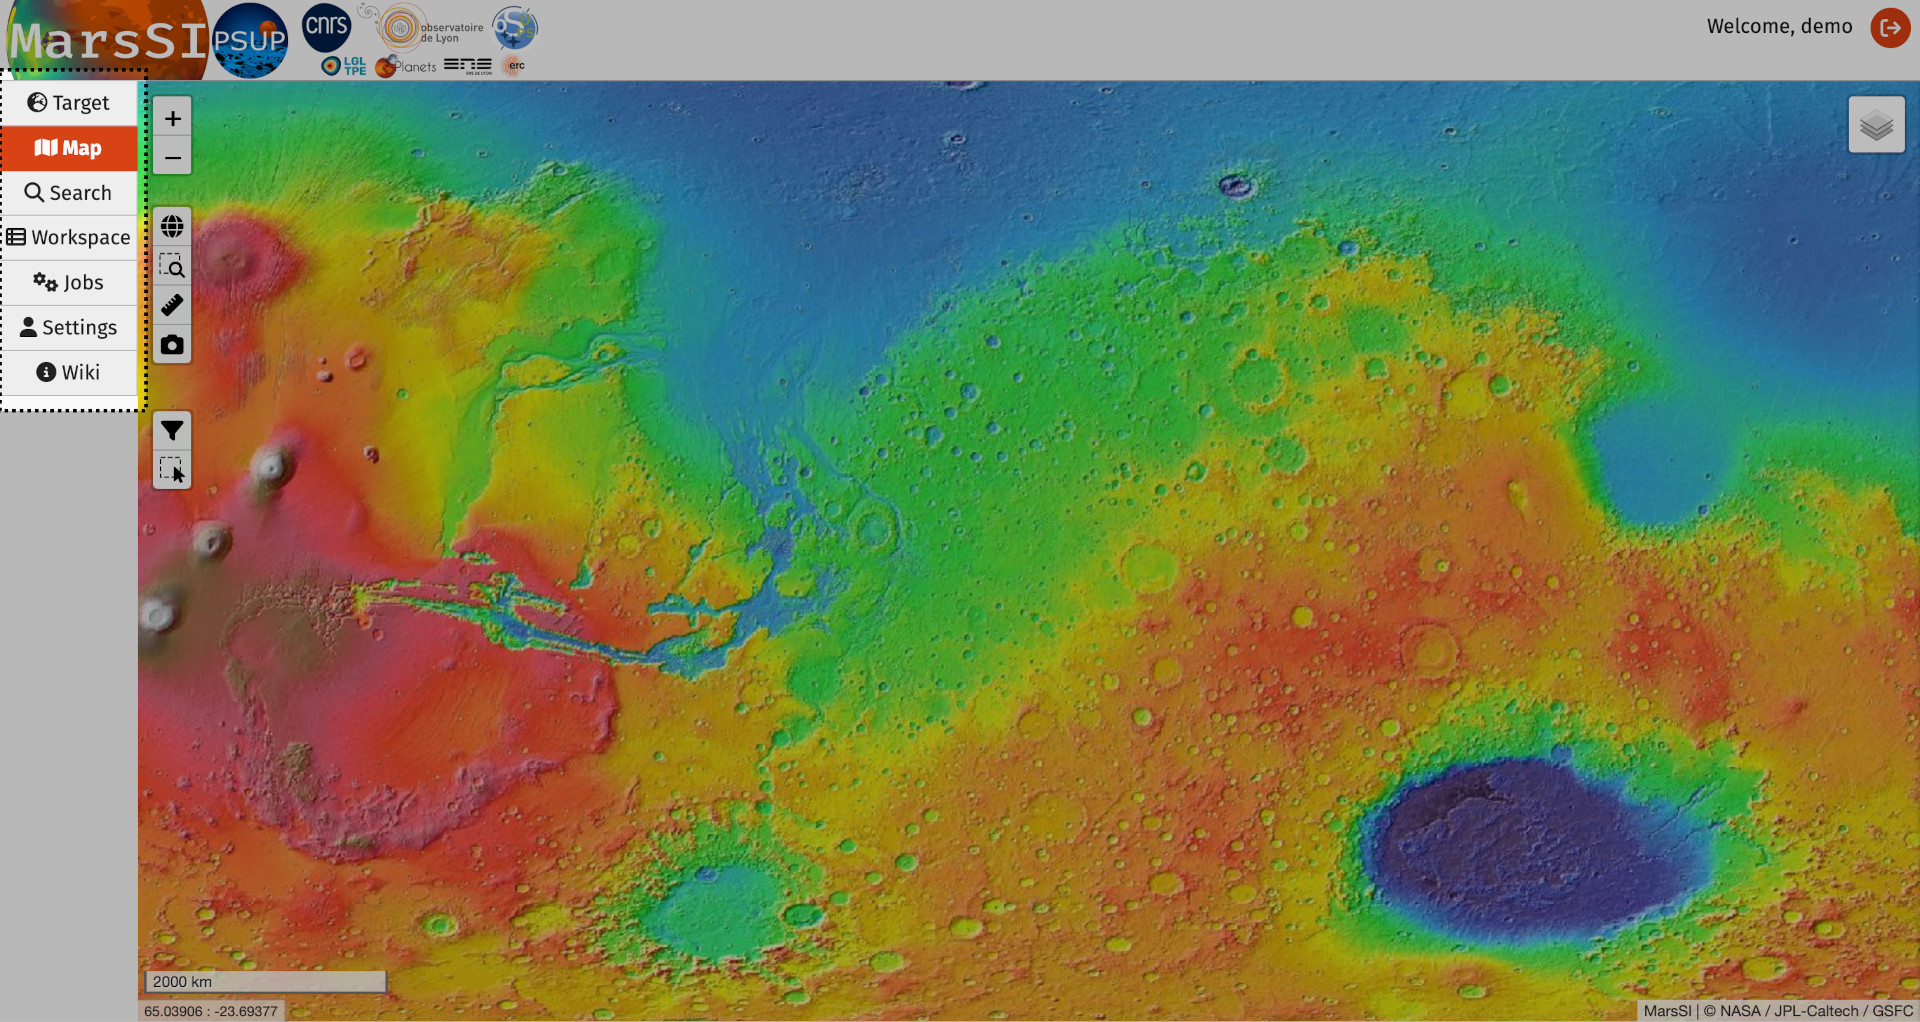
On the top right corner, you will have links to edit your profile informations and logout of the portal.
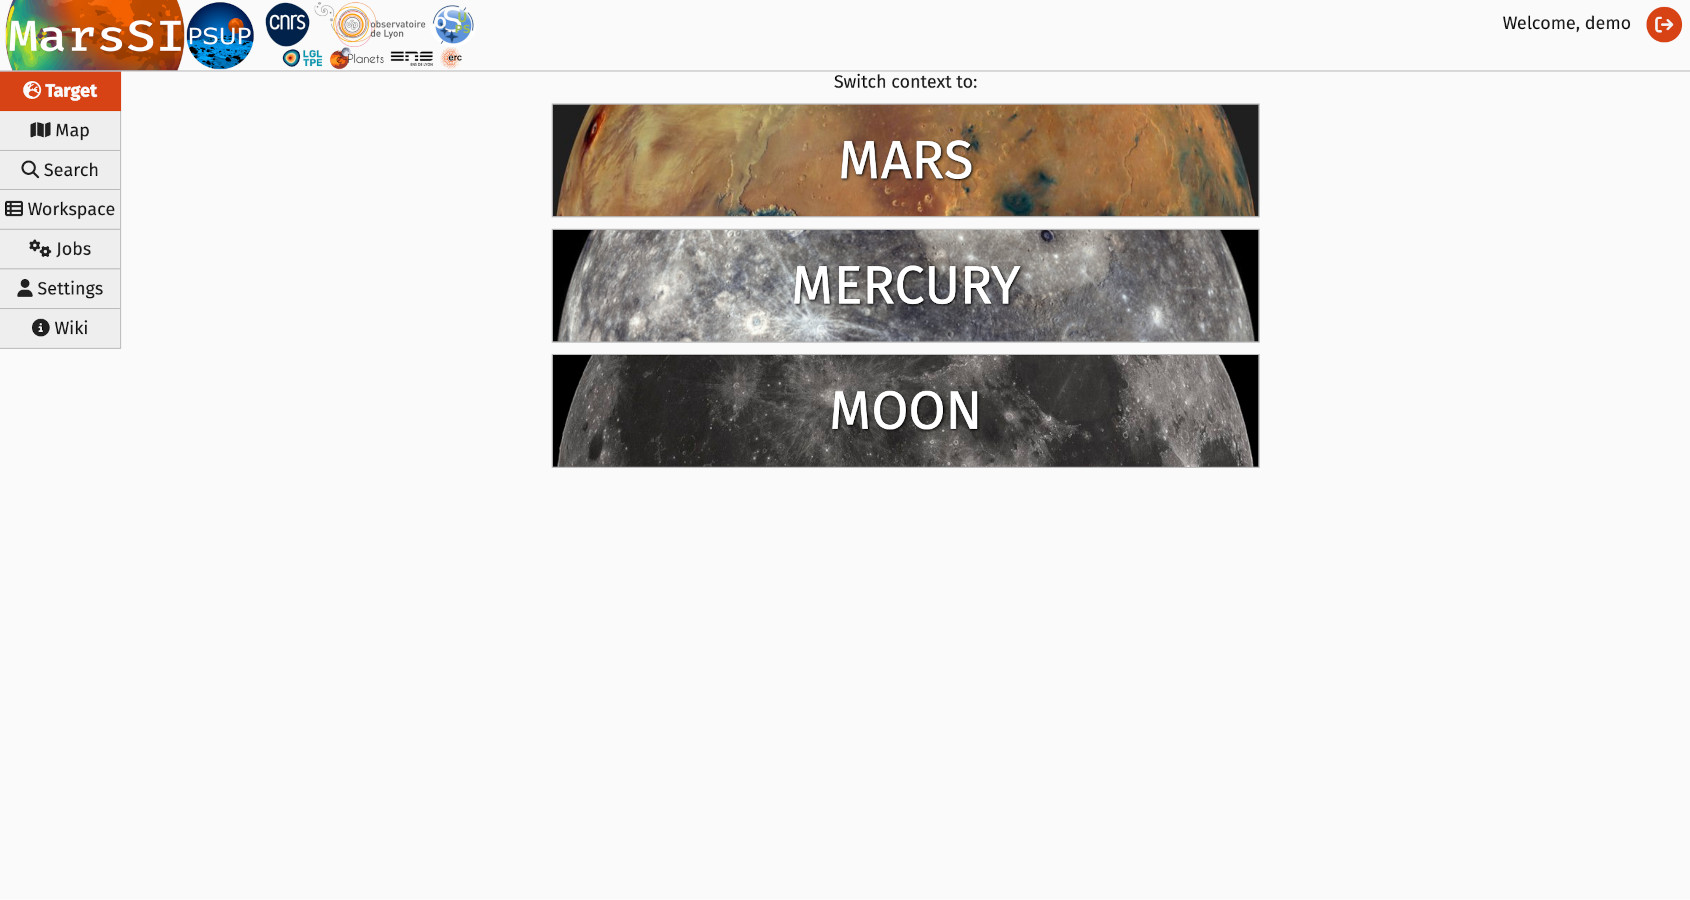
"Target" tabs
This simple tab list the targets (planets) you can switch to. When you switch to a target, it will displayed in the map tab and used to filter search results.
"Map" tabs
The Map tab present a geographic view with a set of map tools and a layer button. It will help you to select the observation you desire and add them to your cart for further processing.
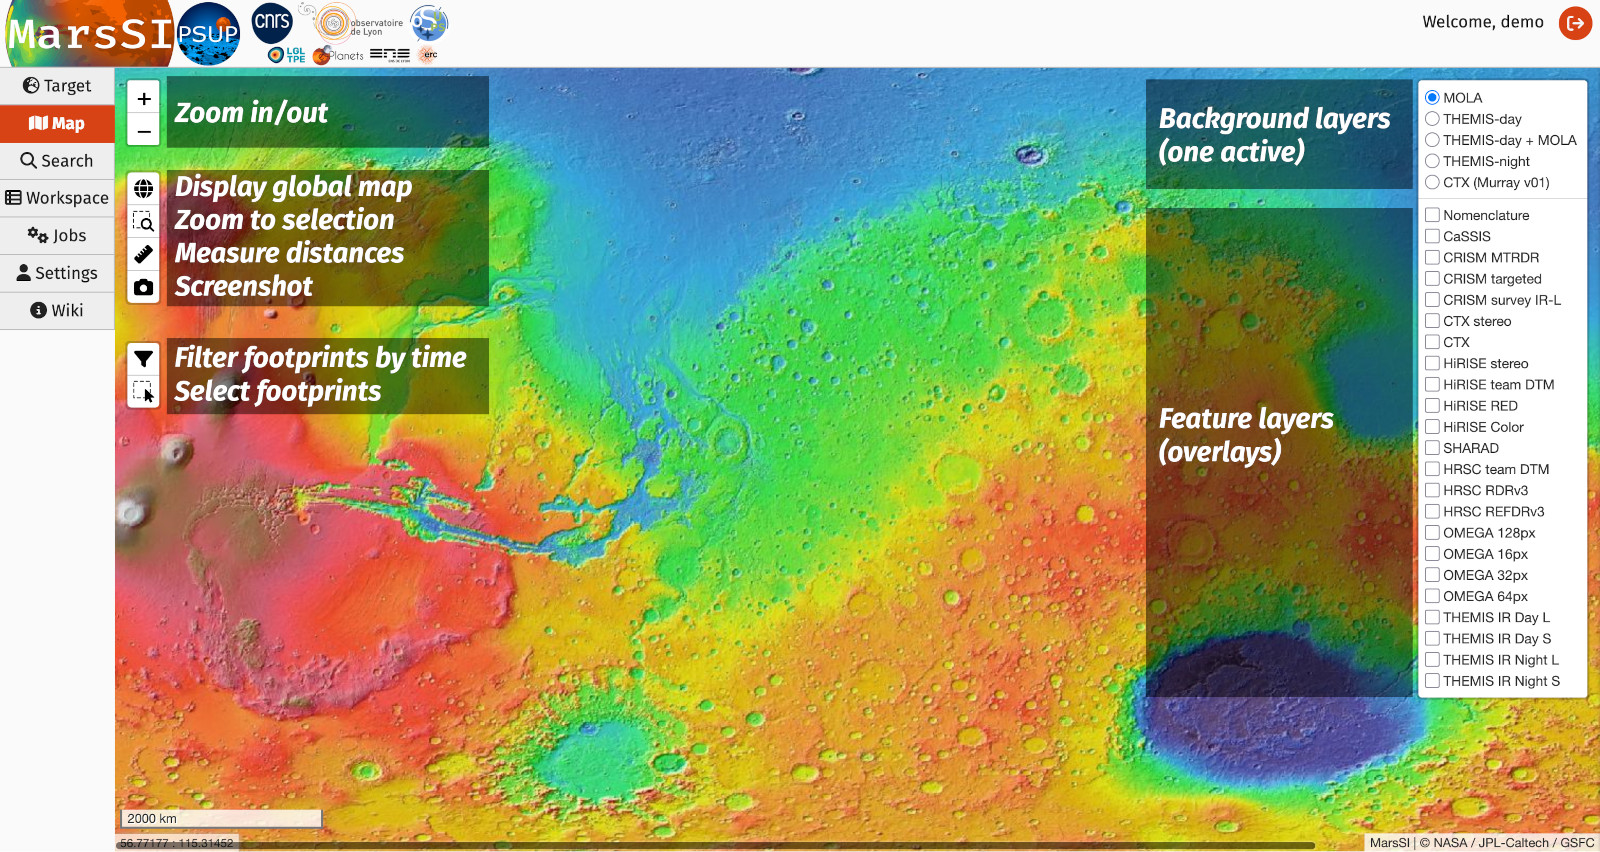
When you click on the layers button, it will expand into the list of available layers. This list is divided in two groups. The first is the background layers list, which select which map to display in your view. The default map correspond to the Mars Orbiter Laser Altimeter (MOLA) topographical map of Mars. Other layers are available, such as the THermal EMIssion Spectrometer (THEMIS) day infrared global map. You can only select one background layer at a time. The other group list the acquisitions/products made available from the various missions including Mars Reconnaissance Orbiter (MRO), Mars Express (MEx) and Mars Odyssey (MO). Those products are only displayed in footprint shapes over the map, but you can display more than one of them. See the various data sections to learn more about those datasets.
The map tools provides you with a few controls: you can zoom in and out using the buttons (or mouse wheel). The next button will reset the world view if you're lost. You can also use the measure tool to perform some distance measurements on the map. Finally, if you want to display information about a dataset, simply click on it to have a popup with its attributes displayed.
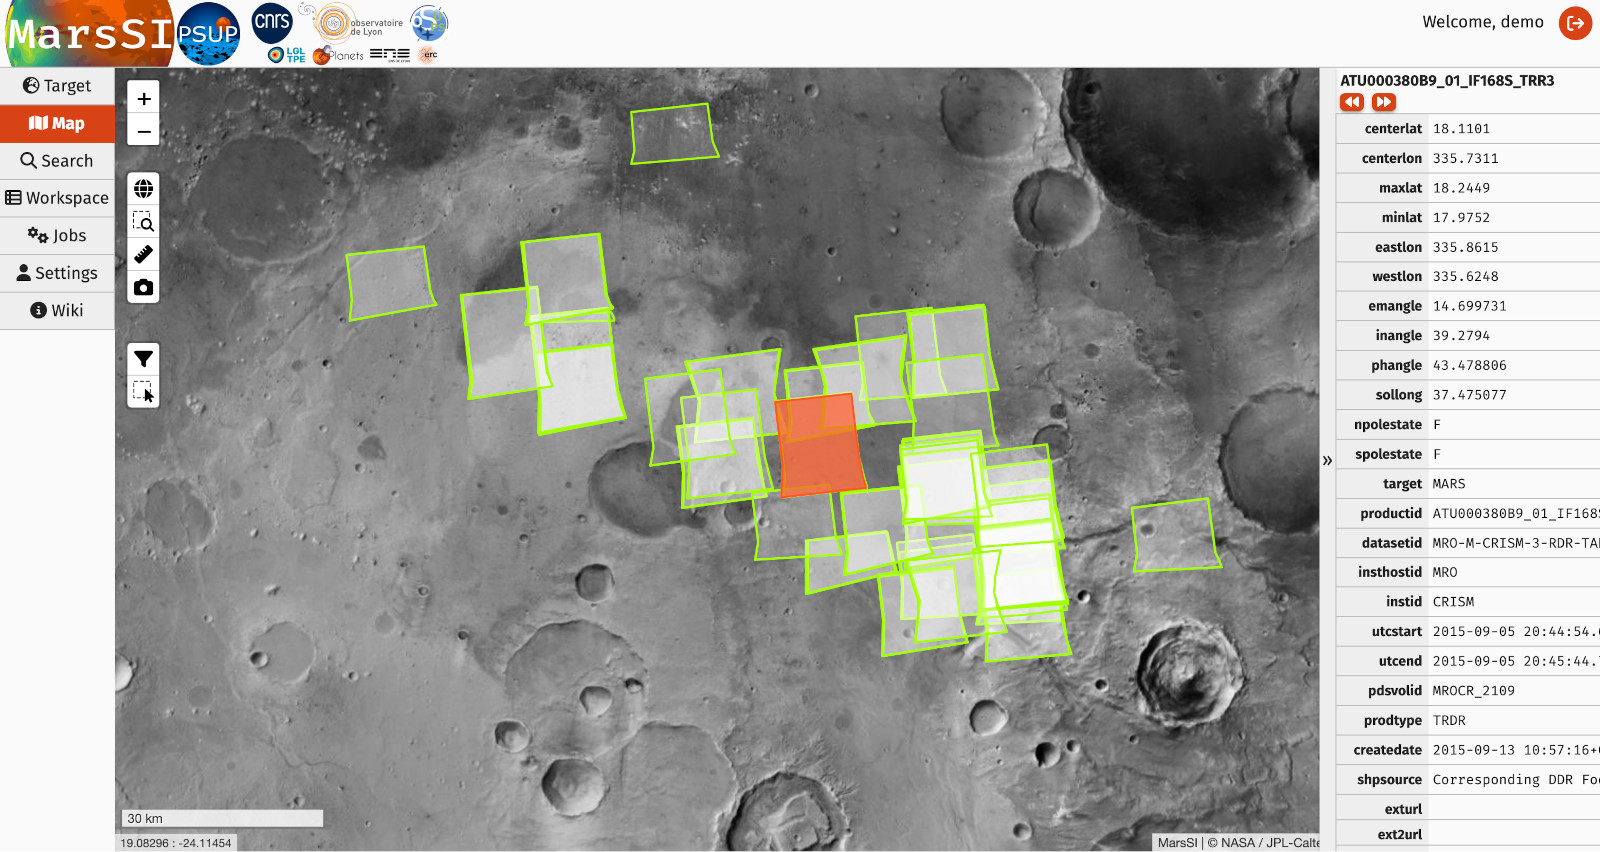
The "select area" control will allow you to draw a rectangle and select products from the displayed dataset layers. You can repeat this operation to add more products to your selection. You can then right-click to either erase your selection or send it to your workspace where you will be able to perform more actions (see Workspace section).
"Search" tab
The search tab allows to look for observations based on keywords. There is mostly two ways to search for data: either use generic keywords and maybe some coordinates to get a selection of data corresponding, or try to enter a product ID to find a more specific observation.
With the first approach, the search engine will try to recognize words such as targets (mars, moon, mercury, ...), orbiters (mro, mex, ...), instruments (omega, hirise, ...), product types (edr, dem...) and return a list of observations that fit those keywords. If a coornidate in the "lat:lon" format is present, only observation that cover this point are shown.
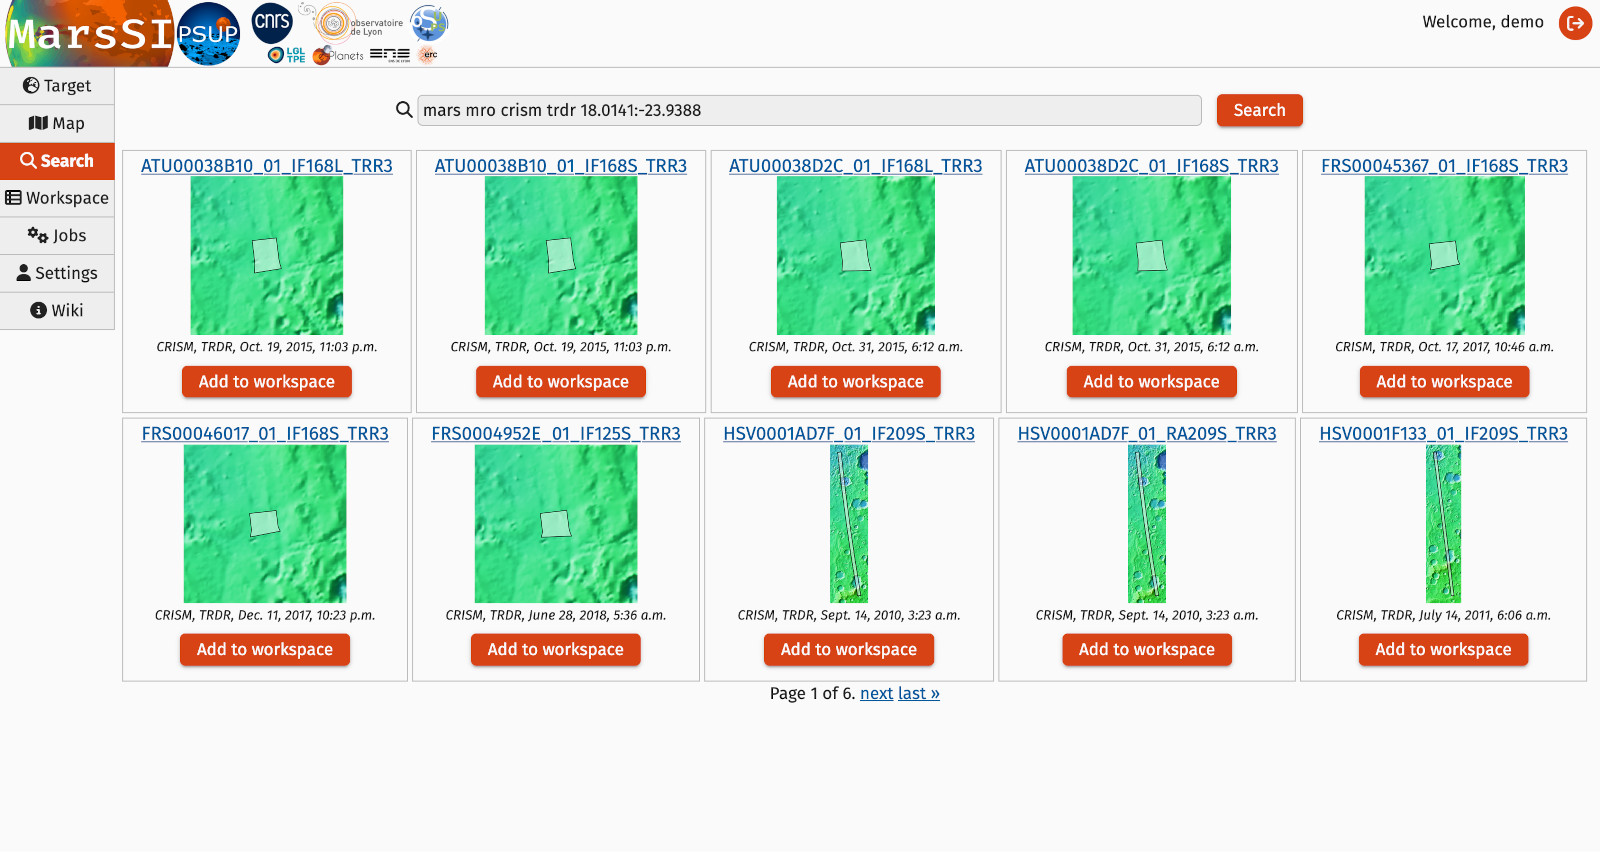
Note that results are paginated, be sure to check following pages.
Words that are not recognized are taken to be a product ID search critera. The search will try to find all the observations with a (partial) matching of product ID.
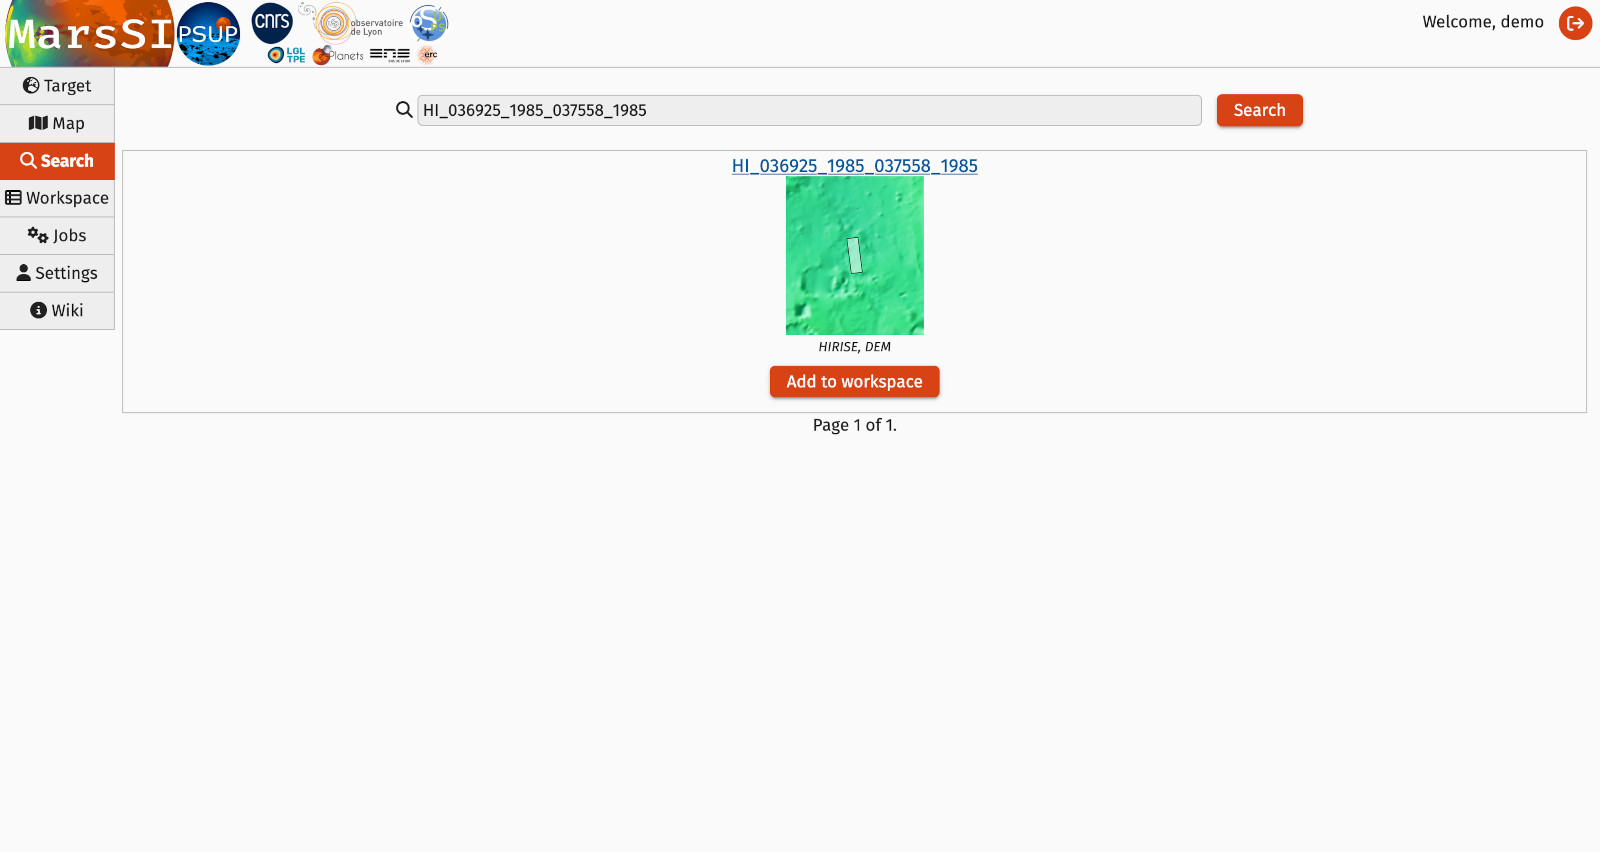
For earch result, you can click the "Add to workspace" button to add the specific observation to your workspace, as if it was selected from the map tab.
"Workspace" tab
When you are done exploring and selecting data, click on the "Workspace" tab. Here, the data you are interested in will be displayed in a table with the following columns:
- Datasets: the global identifier for an acquisition
- Instrument: the instrument the dataset use
- Observation time: time of the acquisition, if applicable
- Products: each dataset can be divided or processed into multiple products, the color indicate the product status
- Footprint quicklook: display the footprint of this dataset
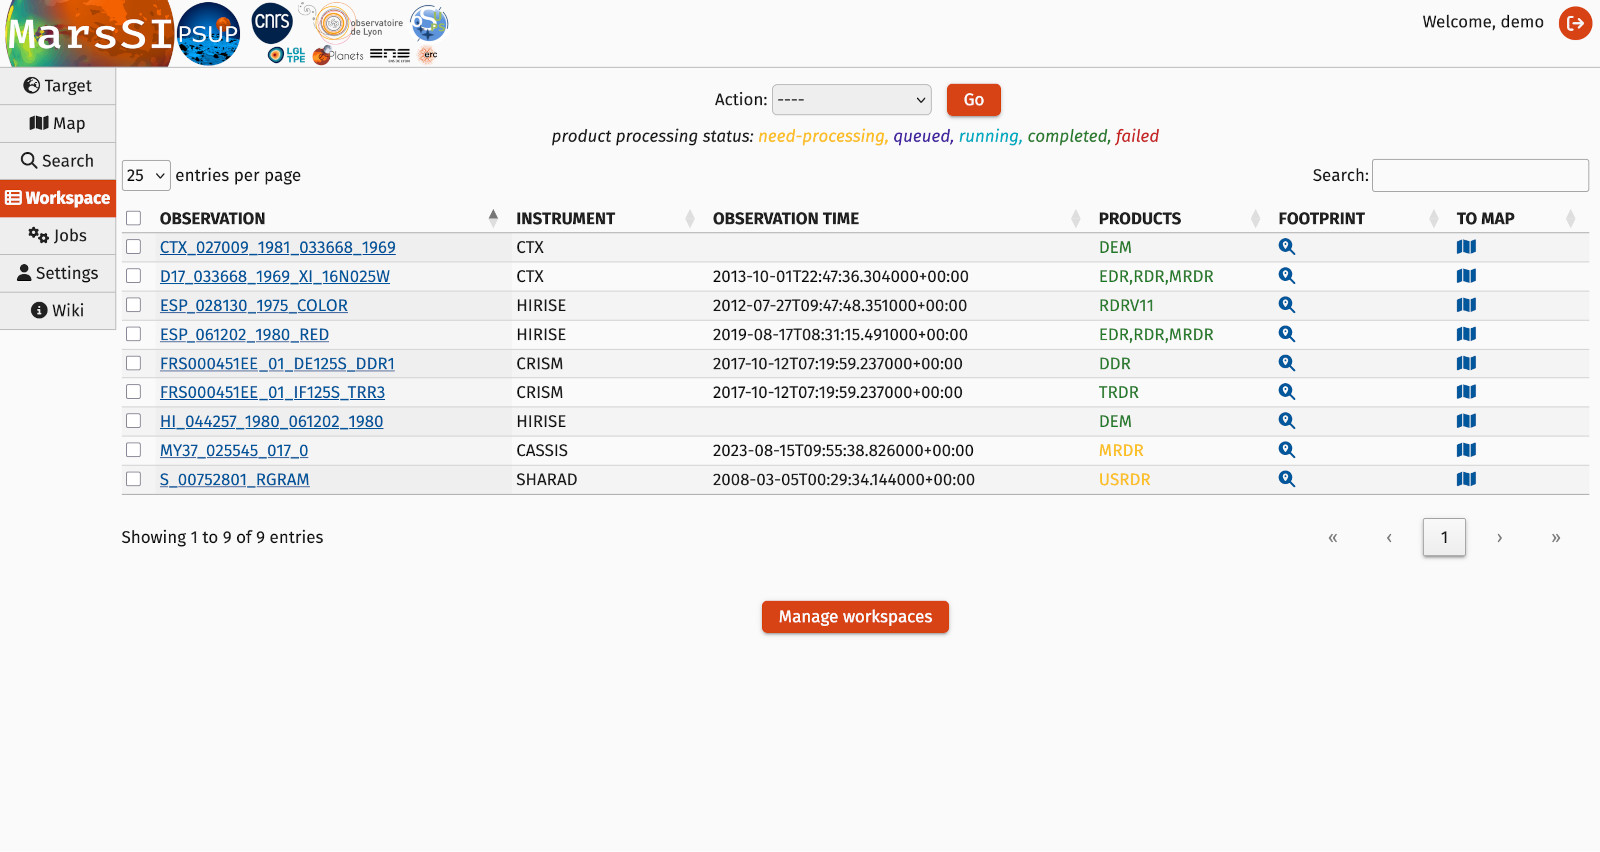
Product statuses are the following:
- need-processing
- this product is not processed yet, you must request it
- queued
- this product has been requested, but is waiting for a computation slot
- running
- this product is being processed
- completed
- this product is ready -- you can request a copy to use it
- failed
- this product processing failed -- it is unusable
You can adjust the number of dataset list in one page, or change pages as needed. You can select dataset by either ticking the checkbox on the left of their row, or use the "Select all" and "Select none" buttons. Use the "Search" field to filter your workspace.
On the top of the tab, you have three action buttons:
- Remove: the selected datasets are removed from your workspace (but it is still in MarsSI catalog!)
- Process: request the selected datasets to be processed
- Copy: request to copy the dataset to your personal SFTP directory
Select the observations entries you would like to process with the ticks on the left of the data table, then select the Process action and click "Go". You can also queue Copy request so that data is copied to your personal directory -- if there is queued or running jobs regarding the data, the copy operation will be scheduled to run after the processing is finished.
You need to process a dataset until you have all the products you want, then use the copy action to have these results in your personal directory. Process and copy status can be seen on the "Jobs" tab (see next item).
"Jobs" tab
The job tab allow you to follow your processing request statuses. You will only see the jobs you have initiated, but this can give you some information about when a processing started and its state.
Log out
If you need to logout of MarsSI, click the "Log out" link at the top-right corner of the window. Your workspace is saved accross logins and any processing queued or running will be processed when possible.
Retrieving the data
To retrieve the data, you must have requested copies as shown at the end of the Workspace section, and those "copy" jobs must be finished. Data copied is kept for 30 days, but the original is not deleted from MarsSI, so you can re-request a copy if needed.
Product copied to your home directory can be retrieved using SFTP as shown in the SFTP tutorial.